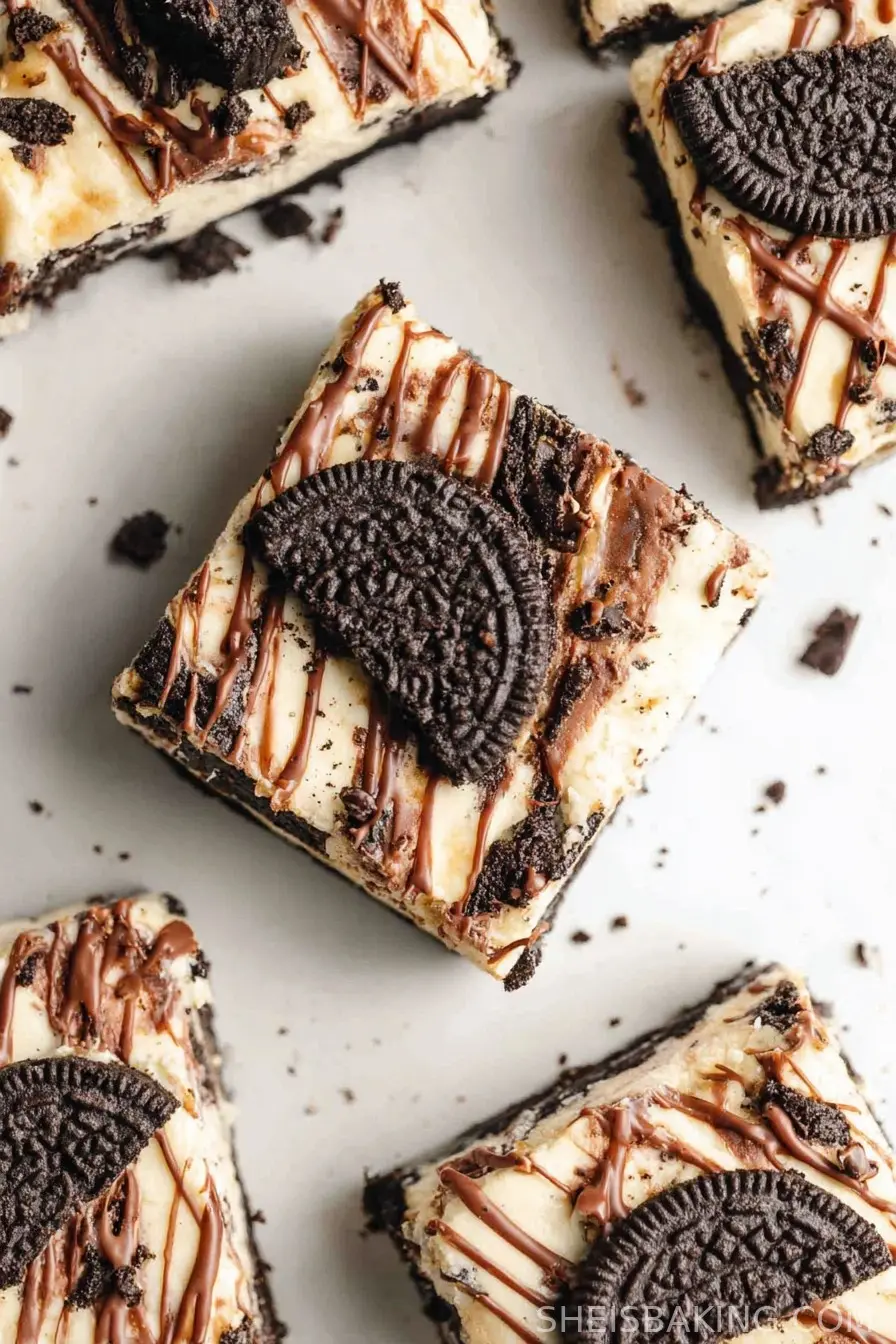
Oreo Cheesecake Bars have quickly gained status as a must-have dessert beloved in homes, bakeries, and cafés across the world. Combining the iconic crunch and chocolatey flavor of Oreo cookies with the rich creaminess of traditional cheesecake, these bars are a modern twist on two classic sweets.
Popularized in the 21st century with the rise of creative dessert hybrids, Oreo Cheesecake Bars are the perfect treat for parties, potlucks, holiday gatherings, or whenever you crave a decadent and satisfying slice of indulgence.
This scrumptious dessert is not only visually appealing with its contrasting layers of dark and creamy tones, but it also strikes the perfect balance between sweet and tangy flavors with a satisfying crunch.
The recipe for Oreo Cheesecake Bars is designed for both ease and versatility, making it accessible for novice bakers and rewarding for experienced dessert enthusiasts alike.
By using everyday ingredients and straightforward techniques, you can recreate these creamy bars in your own kitchen, delighting family and friends with the irresistible combination of cookies and cheesecake.
Whether you want to reminisce about your favorite childhood treat or impress at your next celebration, this recipe delivers an unforgettable dessert experience, blending nostalgia with contemporary flair. Get ready to discover why Oreo Cheesecake Bars have earned a special place in the world of homemade desserts.
Ingredients
- 24 Oreo cookies, finely crushed (for crust)
- 5 tablespoons unsalted butter, melted
- 16 ounces (2 packages) cream cheese, softened
- ½ cup granulated sugar
- 2 large eggs
- 1 teaspoon pure vanilla extract
- ½ cup sour cream
- 12 Oreo cookies, roughly chopped (for filling)
- Optional: additional crushed Oreos for garnish
Instructions
- Preheat your oven to 350°F (175°C). Line a 9-inch square baking pan with parchment paper, leaving some overhang on two sides for easy removal.
- In a medium bowl, combine the finely crushed Oreos for the crust with the melted butter. Stir until well mixed and resembling damp sand.
- Press the Oreo-butter mixture firmly and evenly into the bottom of the prepared baking pan to form the crust. Use the bottom of a glass or measuring cup to pack it down tightly.
- Bake the crust for 8 minutes, then remove from the oven and let it cool slightly while you prepare the cheesecake filling.
- In a large mixing bowl, beat the softened cream cheese with an electric mixer until smooth and creamy, about 2 minutes.
- Add the granulated sugar and continue beating until fully incorporated and creamy.
- Beat in the eggs, one at a time, mixing well after each addition.
- Blend in the vanilla extract and sour cream, mixing until the mixture is smooth and no lumps remain.
- Gently fold in the roughly chopped Oreos with a spatula to evenly distribute cookie chunks throughout the batter.
- Pour the cheesecake mixture over the baked crust and smooth the top with a spatula.
- Bake in the preheated oven for 35-40 minutes, or until the edges are set and the center jiggles slightly when gently shaken.
- Remove from oven and let cool at room temperature for 1 hour.
- Cover and refrigerate the bars for at least 3 hours (or overnight) to fully set.
- Once chilled, use the parchment paper overhang to lift the bars out of the pan. Cut into squares and, if desired, garnish with extra crushed Oreos before serving.
Nutritional Information
Oreo Cheesecake Bars are a rich and indulgent dessert, but mindful portioning can allow you to enjoy them as part of a balanced diet.
Each bar (when cut into 16 pieces) contains an estimated 230-260 calories, with approximately 4 grams of protein, 16 grams of fat, and 21 grams of carbohydrates. The majority of calories come from the cream cheese and cookies, making these bars a source of dietary fats and sugars.
While not low in sugar or saturated fat, these treats can be enjoyed in moderation for special occasions. The inclusion of cream cheese and eggs offers some protein and calcium.
For those watching their intake of refined sugars and saturated fats, consider using light cream cheese or reduced-fat Oreos to slightly decrease calorie and fat content. If a gluten-free option is required, gluten-free sandwich cookies can be used in place of traditional Oreos.
Despite being a dessert high in calories and sugar, Oreo Cheesecake Bars deliver a satisfying flavor that makes them perfect for sharing, ensuring pleasure without overindulgence.
Remember, healthy eating habits allow for occasional treats, and savoring a homemade dessert like these bars can be a delightful part of a balanced lifestyle.

Wine and Beverage Pairings
Oreo Cheesecake Bars pair wonderfully with a range of beverages. For a classic combination, serve them alongside a hot cup of freshly brewed coffee or a chilled glass of milk, both of which help balance the sweetness and enhance the dessert's creamy texture.
For a luscious adult pairing, opt for a rich port wine or a coffee-flavored liqueur such as Kahlúa. If you prefer lighter options, an iced latte or a robust black tea work beautifully by providing contrast to the richness of the cheesecake.
For special occasions, serve Oreo Cheesecake Bars with a dessert wine such as Moscato or an espresso martini for a sophisticated touch. No matter your choice, the right beverage can elevate this dessert and complement its chocolatey, creamy flavors.
Cooking Tips and Variations
To achieve the perfect Oreo Cheesecake Bars, follow a few handy tips and try some creative variations. Always use room-temperature cream cheese, as it blends more smoothly and creates a velvety cheesecake filling without lumps. When packing the crust, press it down firmly so it holds together when sliced.
Avoid overmixing the batter after the eggs are added; this can introduce too much air and lead to cracks. Letting the bars cool gradually and chilling them thoroughly ensures clean, neat slices. For a gluten-free version, substitute regular Oreos with a gluten-free alternative.
Try adding ½ cup of mini chocolate chips to the filling for extra richness or swirl in 2 tablespoons of creamy peanut butter before baking for an indulgent twist. Swap sour cream for plain Greek yogurt to add a tangy note and boost the protein content.
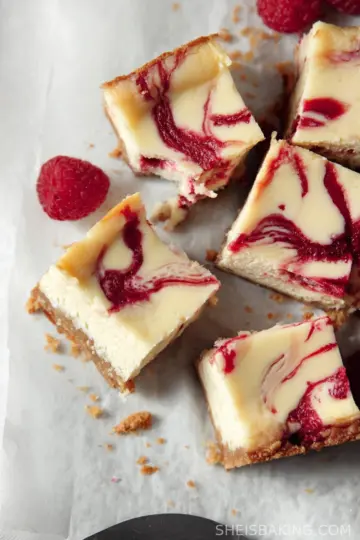
For those who enjoy fruit, folding in a handful of fresh raspberries or strawberries can elevate the flavor with a pop of tartness. If baking for a crowd, double the ingredients and use a 9x13-inch pan, adjusting the baking time as needed.
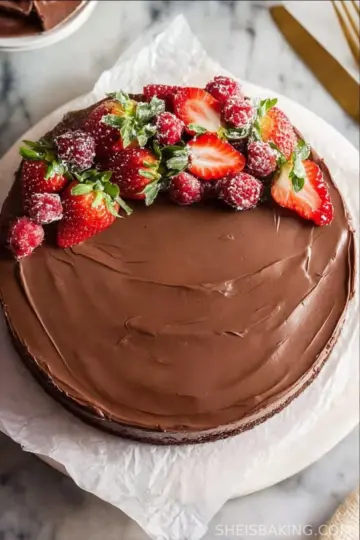
Feel free to top the finished bars with a drizzle of chocolate ganache or a dollop of whipped cream before serving. These versatile Oreo Cheesecake Bars adapt easily to personal preferences, ensuring there's a delicious version for everyone.

Serving Suggestions
For the best presentation, cut the thoroughly chilled bars into even squares using a sharp knife wiped clean between cuts. Arrange the Oreo Cheesecake Bars on a decorative serving platter or rustic wooden board for a visually striking effect.
If desired, dust the tops with additional crushed Oreos, a drizzle of chocolate sauce, or a sprinkle of mini chocolate chips.
For a festive touch, serve each bar with a small dollop of whipped cream and a slice of fresh strawberry or raspberry on the side to add color and a hint of tartness. These bars are perfect at room temperature or slightly chilled.
Bring them out about 10-15 minutes before serving to allow the flavors and textures to shine. When serving at gatherings or picnics, place each bar in a decorative cupcake liner or parchment square for easy handling and minimal mess.
Oreo Cheesecake Bars make ideal dessert table offerings at birthdays, holidays, potlucks, and office parties-guaranteed to be the first treat to disappear.
Paired with coffee, tea, or dessert wine, they provide a satisfying end to any meal, and their versatile nature allows them to be enjoyed at casual family events and elegant occasions alike.
Health Benefits
While Oreo Cheesecake Bars are an indulgence best enjoyed in moderation, they do provide certain nutritional benefits. The cream cheese base offers a source of protein and calcium, supporting bone health and satiety.
Eggs bring additional protein and essential vitamins, while the cookies contribute a dose of carbohydrates for quick energy.
That said, the dessert is high in sugar and saturated fat, so those with dietary restrictions or health considerations may want to enjoy smaller portions or make recipe modifications such as using light cream cheese, reduced-fat cookies, or sugar alternatives.
For a gluten-free treat, gluten-free sandwich cookies work just as well as traditional Oreos. Homemade bars also allow control over additives and preservatives often found in store-bought treats.
Occasional enjoyment of a sweet like Oreo Cheesecake Bars can form part of a balanced lifestyle, bringing joy and satisfaction when paired with healthier choices throughout the day.

Frequently Asked Questions
Yes, Oreo Cheesecake Bars can be made up to two days in advance. They need at least 3 hours to chill, but overnight refrigeration enhances their flavor and texture. Store them covered in the refrigerator until ready to serve.
Absolutely! Once fully chilled and sliced, wrap the bars individually in plastic wrap and place them in an airtight container. They can be frozen for up to two months. Thaw overnight in the refrigerator before serving.
Yes, feel free to experiment with different sandwich cookies or chocolate cookies for the crust and filling. Options like chocolate chip cookies, graham crackers, or peanut butter sandwich cookies work well and provide a unique twist.
To minimize cracking, avoid overmixing the batter once the eggs are added, and don't overbake. Ensuring the bars cool gradually at room temperature before refrigerating also helps maintain a smooth surface.
Traditional Oreo Cheesecake Bars are not gluten-free due to the cookies. However, using gluten-free sandwich cookies as a substitute allows you to make a delicious gluten-free version.
Oreo Cheesecake Bars are the ultimate crowd-pleasing dessert, combining everyone's favorite cookie with creamy cheesecake in an easy-to-make bar form. With their rich, chocolatey crust, velvety filling dotted with Oreo pieces, and endless opportunities for creative tweaks, these bars are a staple for celebrations and everyday treats alike. By following this tried-and-true recipe, applying handy tips, and exploring serving and beverage options, you can craft bakery-quality Oreo Cheesecake Bars in your own kitchen. Satisfy your sweet tooth and impress your guests with a dessert that never fails to delight.
Ingredients
- 24 Oreo cookies, divided
- 4 tablespoons unsalted butter, melted
- 16 ounces cream cheese, softened
- ½ cup granulated sugar
- 2 large eggs
- 1 teaspoon vanilla extract
- ½ cup sour cream
- ¼ teaspoon salt
Instructions
-
1Preheat the oven to 325°F (163°C). Line an 8x8-inch baking pan with parchment paper, leaving an overhang for easy removal.
-
2Crush 16 Oreo cookies in a food processor until fine crumbs form. Combine with melted butter and press firmly into the bottom of the prepared pan to form the crust.
-
3In a large mixing bowl, beat cream cheese and sugar together until smooth and creamy. Add eggs, one at a time, mixing well after each addition. Add vanilla extract, sour cream, and salt; beat until combined.
-
4Roughly chop the remaining 8 Oreo cookies and fold them into the cheesecake batter.
-
5Pour the batter over the Oreo crust and smooth the top. Bake for 32-35 minutes, or until the center is set and the edges are lightly golden.
-
6Allow to cool completely at room temperature, then refrigerate for at least 3 hours before slicing into bars. Serve chilled.
Approximate Information for One Serving
Nutrition Disclaimers
Number of total servings shown is approximate. Actual number of servings will depend on your preferred portion sizes.
Nutritional values shown are general guidelines and reflect information for 1 serving using the ingredients listed, not including any optional ingredients. Actual macros may vary slightly depending on specific brands and types of ingredients used.
To determine the weight of one serving, prepare the recipe as instructed. Weigh the finished recipe, then divide the weight of the finished recipe (not including the weight of the container the food is in) by the desired number of servings. Result will be the weight of one serving.
Did you make this recipe?
Please consider Pinning it!!

Leave a Reply